SSH remote IoT device management using Raspberry Pi offers a powerful, cost-effective solution for controlling and monitoring smart devices from anywhere in the world. The Internet of Things (IoT) is revolutionizing the way we interact with technology, and Raspberry Pi serves as an ideal platform for building and managing IoT projects. With SSH (Secure Shell), you can securely connect to your IoT devices remotely, enabling seamless control and management without spending a dime on expensive proprietary software.
In this article, we will explore how to set up SSH for remote IoT device management using Raspberry Pi. Whether you're a hobbyist or a professional developer, understanding SSH and its applications will empower you to create innovative IoT solutions. From configuring Raspberry Pi to troubleshooting common issues, this guide will provide you with step-by-step instructions and valuable insights.
By the end of this article, you will have a comprehensive understanding of SSH remote IoT device management using Raspberry Pi. Let's dive in and discover how this versatile technology can enhance your IoT projects while keeping costs to a minimum.
Table of Contents
- Introduction to SSH and Raspberry Pi
- Setting Up Your Raspberry Pi for SSH
- Understanding SSH Basics
- Establishing a Secure Remote Connection
- Integrating IoT Devices with Raspberry Pi
- Troubleshooting Common SSH Issues
- Optimizing SSH Performance
- Enhancing SSH Security
- Real-World Use Cases for SSH IoT Management
- Conclusion and Next Steps
Introduction to SSH and Raspberry Pi
What is SSH?
SSH, or Secure Shell, is a cryptographic network protocol that allows users to securely access and manage remote devices over an unsecured network. It provides a secure channel for communication, ensuring that sensitive data remains protected from unauthorized access. SSH is widely used in server management, network administration, and IoT device control.
Why Use Raspberry Pi for IoT Projects?
Raspberry Pi is a popular choice for IoT projects due to its affordability, versatility, and open-source nature. With its small form factor and powerful processing capabilities, Raspberry Pi can serve as the brain of your IoT setup. By combining Raspberry Pi with SSH, you can remotely manage and monitor your IoT devices from anywhere in the world.
Benefits of SSH Remote IoT Device Management
Using SSH for remote IoT device management offers several advantages, including:
- Cost-Effective: No need for expensive proprietary software.
- Secure: Encrypted communication ensures data privacy.
- Flexible: Compatible with various IoT devices and platforms.
- Scalable: Easily manage multiple devices from a single interface.
Setting Up Your Raspberry Pi for SSH
Hardware Requirements
Before diving into the setup process, ensure you have the following hardware components:
- Raspberry Pi (any model with Ethernet or Wi-Fi support)
- MicroSD card with Raspberry Pi OS installed
- Power adapter compatible with your Raspberry Pi model
- Ethernet cable or Wi-Fi access (optional)
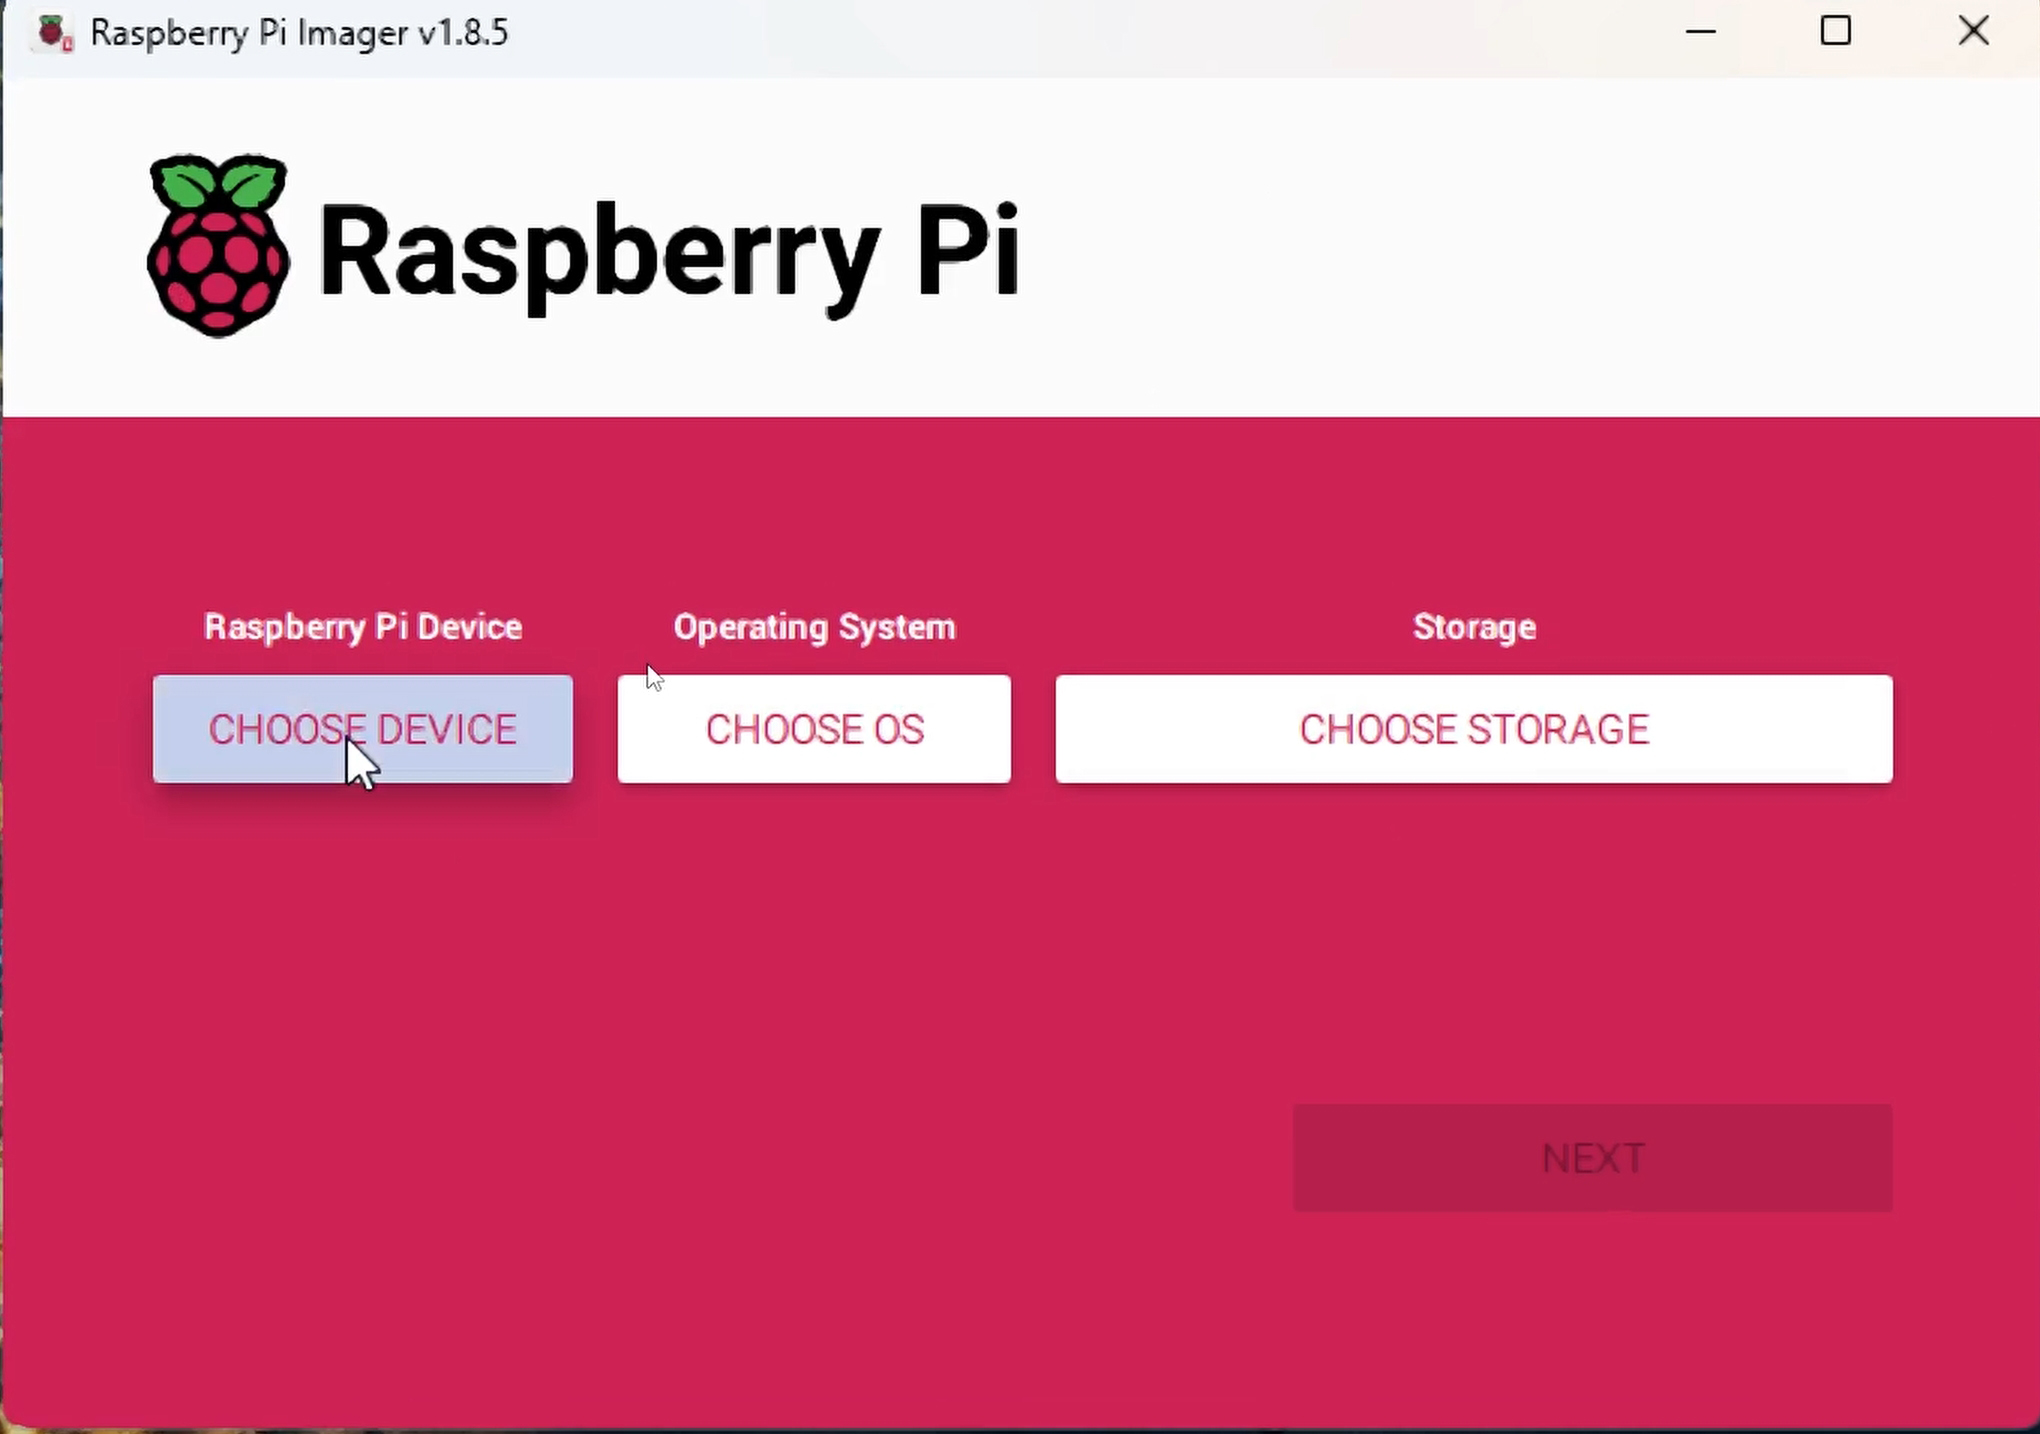
Installing Raspberry Pi OS
Raspberry Pi OS is the official operating system for Raspberry Pi devices. To install it:
- Download the Raspberry Pi Imager tool from the official Raspberry Pi website.
- Insert a blank microSD card into your computer.
- Launch the Raspberry Pi Imager and select the latest version of Raspberry Pi OS.
- Choose the microSD card as the target device and click "Write" to install the OS.
Enabling SSH on Raspberry Pi
By default, SSH is disabled on Raspberry Pi OS for security reasons. To enable it:
- Insert the microSD card into your computer and navigate to the boot partition.
- Create an empty file named "ssh" (without any file extension) in the boot partition.
- Insert the microSD card into your Raspberry Pi and power it on.
Understanding SSH Basics
How Does SSH Work?
SSH works by establishing a secure, encrypted connection between a client (your computer) and a server (your Raspberry Pi). This connection allows you to execute commands, transfer files, and manage resources remotely. The process involves:
- Authentication: Verifying the identity of the client and server.
- Encryption: Protecting data transmitted between the client and server.
- Command Execution: Running commands on the remote device.
SSH Key Pairs
SSH key pairs are a secure alternative to password-based authentication. They consist of a public key (shared with the server) and a private key (kept secret on the client). To generate an SSH key pair:
- Open a terminal on your computer and run the command:
ssh-keygen. - Follow the prompts to specify the file location and passphrase (optional).
- Copy the public key to your Raspberry Pi using the command:
ssh-copy-id pi@raspberrypi.
Establishing a Secure Remote Connection
Connecting to Raspberry Pi via SSH
Once SSH is enabled on your Raspberry Pi, you can connect to it using an SSH client. On Windows, you can use PuTTY, while macOS and Linux users can use the built-in terminal. To connect:
- Find the IP address of your Raspberry Pi using a network scanner or the command:
hostname -I. - Open your SSH client and enter the command:
ssh pi@. - Enter the default password ("raspberry") or your custom password when prompted.
Using SSH for File Transfer
SSH also supports secure file transfer using the SCP (Secure Copy Protocol) or SFTP (SSH File Transfer Protocol). To transfer files:
- Use the command:
scp /path/to/local/file pi@.:/path/to/remote/directory - Alternatively, use an SFTP client like FileZilla for a graphical interface.
Integrating IoT Devices with Raspberry Pi
Connecting Sensors and Actuators
Raspberry Pi can interface with a wide range of IoT devices, including sensors, actuators, and communication modules. Common examples include:
- Temperature and humidity sensors (e.g., DHT22)
- Relay modules for controlling appliances
- WiFi or Bluetooth modules for wireless communication
Writing Python Scripts for IoT Control
Python is a popular programming language for IoT projects due to its simplicity and extensive libraries. To control IoT devices:
- Install the required libraries (e.g.,
Adafruit_DHTfor DHT sensors). - Write a Python script to read sensor data or control actuators.
- Run the script on your Raspberry Pi using SSH.
Troubleshooting Common SSH Issues
SSH Connection Refused
If you encounter the "Connection refused" error, ensure that:
- SSH is enabled on your Raspberry Pi.
- The IP address is correct and the device is connected to the network.
- Firewall rules allow SSH traffic on port 22.
Authentication Failed
Authentication failures may occur due to:
- Incorrect username or password.
- Public key not properly copied to the server.
- SSH key permissions set incorrectly.
Optimizing SSH Performance
Compressing Data for Faster Transfers
Enabling compression can improve SSH performance, especially over slow or high-latency connections. To enable compression:
- Edit the SSH configuration file (
/etc/ssh/sshd_config) on your Raspberry Pi. - Add or modify the line:
Compression yes. - Restart the SSH service using the command:
sudo systemctl restart ssh.
Using SSH Multiplexing
SSH multiplexing allows multiple sessions to share a single connection, reducing connection time and resource usage. To enable multiplexing:
- Edit the SSH client configuration file (
~/.ssh/config). - Add the following lines:
Host raspberrypi ControlMaster auto ControlPath ~/.ssh/%r@%h:%p ControlPersist 600
Enhancing SSH Security
Disabling Password Authentication
To improve security, disable password authentication and rely solely on SSH keys. To do this:
- Edit the SSH configuration file (
/etc/ssh/sshd_config) on your Raspberry Pi. - Set the line:
PasswordAuthentication no. - Restart the SSH service using the command:
sudo systemctl restart ssh.
Changing the Default SSH Port
Changing the default SSH port (22) can reduce the risk of brute-force attacks. To change the port:
- Edit the SSH configuration file (
/etc/ssh/sshd_config) on your Raspberry Pi. - Set the line:
Port. - Restart the SSH service using the command:
sudo systemctl restart ssh.
Real-World Use Cases for SSH IoT Management
Home Automation
SSH enables you to remotely control smart home devices, such as lighting, thermostats, and security systems. By integrating Raspberry Pi with IoT sensors and actuators, you can create a centralized hub for managing your smart home.
Remote Monitoring
SSH allows you to monitor environmental conditions, such as temperature, humidity, and air quality, from anywhere in the world. This is particularly useful for applications like weather stations, greenhouses, and industrial monitoring.
Industrial IoT
In industrial settings, SSH can be used to manage and maintain IoT devices deployed in remote locations. This reduces the need for on-site visits and improves operational efficiency.
Conclusion and Next Steps
In conclusion, SSH remote IoT device management using Raspberry Pi offers a powerful, secure, and cost-effective solution for controlling and monitoring smart devices. By following the steps outlined in this article, you can set up and optimize SSH for your IoT projects while ensuring robust security.
We encourage you to take the following actions:
- Experiment with different IoT devices and sensors to expand your project capabilities.
- Explore advanced SSH features, such as tunneling and port forwarding, to enhance functionality.
- Share your experiences and insights in the comments section below.
Thank you for reading! For more in-depth guides and tutorials, explore our other articles on IoT, Raspberry Pi, and related technologies.